
The island was never supposed to be this quiet—at least not with demons clawing their way into every corner of the Battle Royale map. For Fortnite veterans and newcomers alike, Chapter 6 Season 1 unveiled a gripping narrative arc that begins the moment Kendo sends out his urgent call. This guide takes players through every twist and turn of the Kendo's Calling story quests, breaking down all six stages so they can rack up 150,000 XP without pulling their hair out.

The quest line is no small undertaking. Each stage rewards a hefty 25,000 XP, which means finishing the full chain nearly pushes an account up two whole tiers. With the Demon Warriors terrorizing the land and strange essences pulsing under the surface, the storyline hooks players from the very first bullet fired.
Stage 1 — Speak with Kendo
First things first: gamers need to find Kendo himself. The character isn’t hiding in some obscure bunker; he’s stationed at Sakura Plunge, a serene landmark tucked neatly between Twinkle Terrace and Nightshift Forest. When a player lands there, they’ll immediately notice someone else—a hulking Demon Warrior already swinging at Kendo. Trying to start a conversation mid-battle is impossible, so the only option is to eliminate that demon before anything meaningful can happen.
A good strategy is to grab a weapon from the surrounding cherry blossom structures, aim for the head, and dodge the warrior’s heavy attacks. Once the area is clear, Kendo becomes an ordinary NPC with a yellow exclamation mark above his head. Approach him, hit the interact button, and stage one is in the bag.
✅ Tip: If another player drops at the same spot, prioritize Kendo’s safety—if he gets downed by an opponent, the dialogue option vanishes until the next match.
Stage 2 — Inflict 350 Damage to Demon Warriors
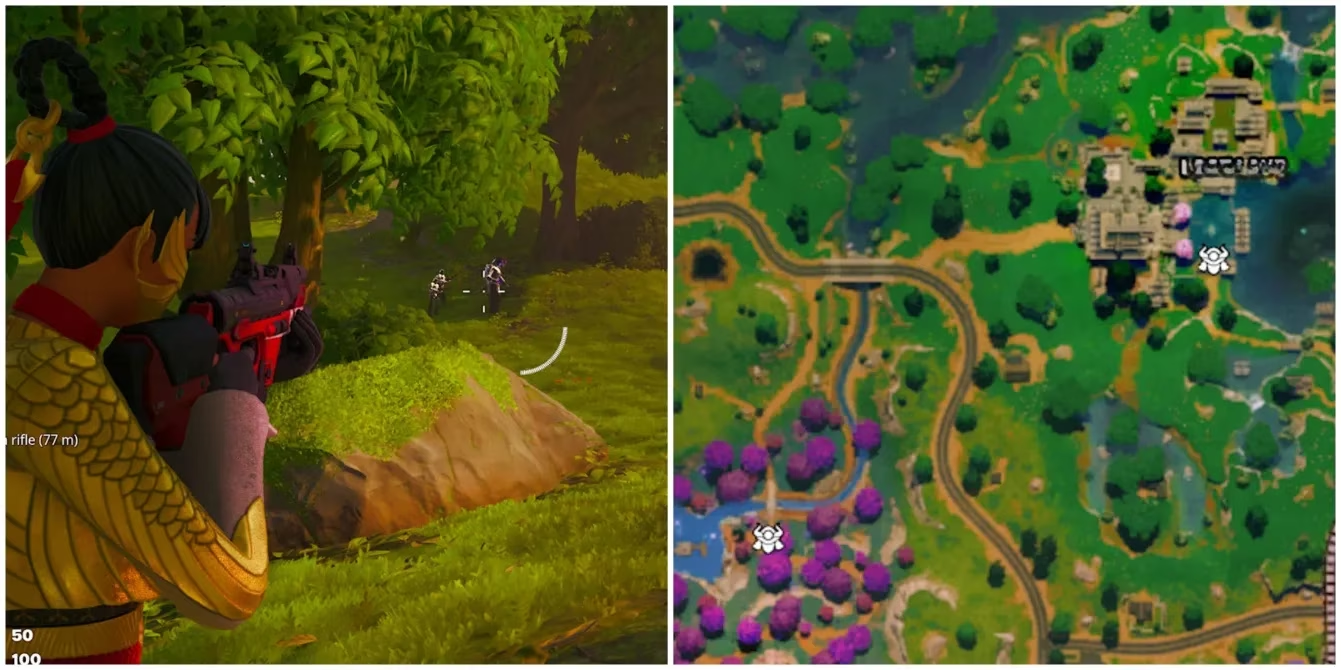
Now things heat up. The second stage asks players to deal a total of 350 damage to Demon Warriors or their weaker Demon Grunt counterparts. There are exactly eight fixed spawn locations across the island, and knowing where they are saves precious match time:
-
🐸 Flooded Frogs
-
🍔 Burd to Go (north of Pumped Power)
-
🌊 Lost Lake
-
🌸 Sakura Plunge (southeast of Twinkle Terrace)
-
🗼 Overlook Lighthouse (northeast of Shining Span)
-
🐢 Kappa Kappa Farm (northwest of Hopeful Heights)
-
🎢 Spiral Shoots (south of Masked Meadows)
-
⛩️ Shogun's Solitude
At Sakura Plunge, only one lone Demon Warrior spawns—tough but manageable. Every other location spawns two weaker Demon Grunts alongside a beefier Demon Warrior. If a player prefers a less chaotic fight, Sakura Plunge is the safest bet. Just be aware that demons also appear later in the match at Forecast Towers, so even if a squad clears the starting locations, reinforcements might pop up mid-game.
A reliable approach is to land at Lost Lake, pick up an assault rifle, and chip away at the grunts from a distance. Because damage counts regardless of whether the demon is eliminated, players don’t need to secure kills—just land enough hits.
💡 Remember: the damage counter is cumulative across matches. If something goes wrong, just queue up again and pick up where you left off.
Stage 3 — Place Spirit Charms
Next comes a more mystical task: placing Spirit Charms at designated spots. The map offers 12 potential locations where these charms can be placed, but the real jackpot is Magic Mosses. That area alone contains three placement spots clustered closely together, making it the fastest way to complete this stage in a single match.
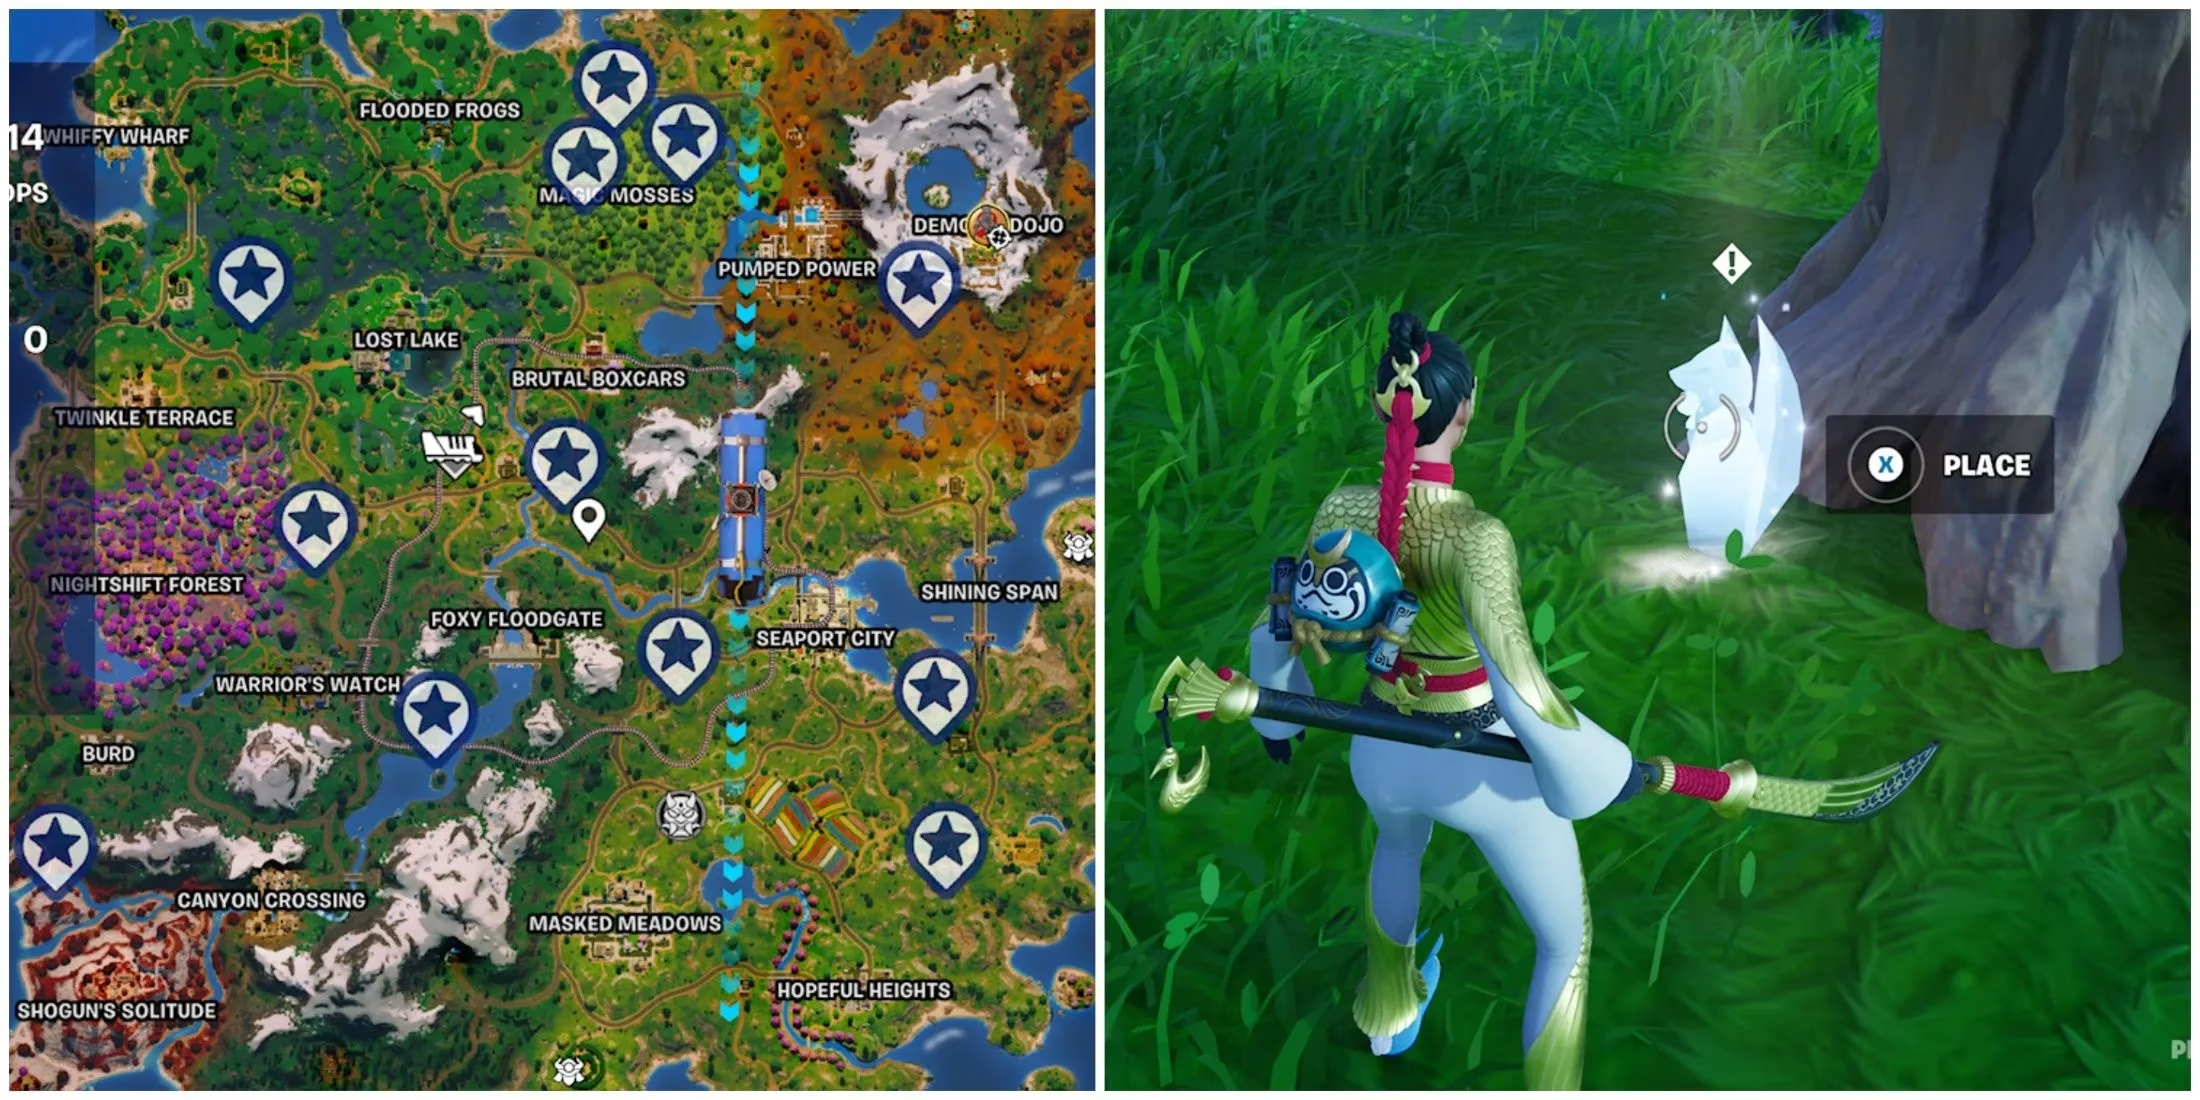
Gamers should head to Magic Mosses right after jumping from the Battle Bus. The charms look like small glowing ritual markers, usually near large trees or mossy rocks. Walk up to one, hold the interact key for a few seconds, and a faint magical animation confirms the job is done. Then immediately run to the next spot.
⚠️ Watch out for campers. Since Magic Mosses is a well-known shortcut for this quest, opponents often lie in wait. A quick sweep of the area with a shotgun before placing charms can save a lot of frustration.
If Magic Mosses is too crowded, the other spawns spread across the map still work—they just take longer. Mix and match to complete the objective without losing too many shields.
Stage 4 — Collect Residual Essences
The fourth stage ramps up the demonic atmosphere again. Players must grab five Residual Essences, but each of the three designated sites—Shogun's Solitude, Demon's Dojo, and Warrior's Watch—only contains three essences apiece. That means at least two different locations must be visited within a single match, which can be tricky under fire.
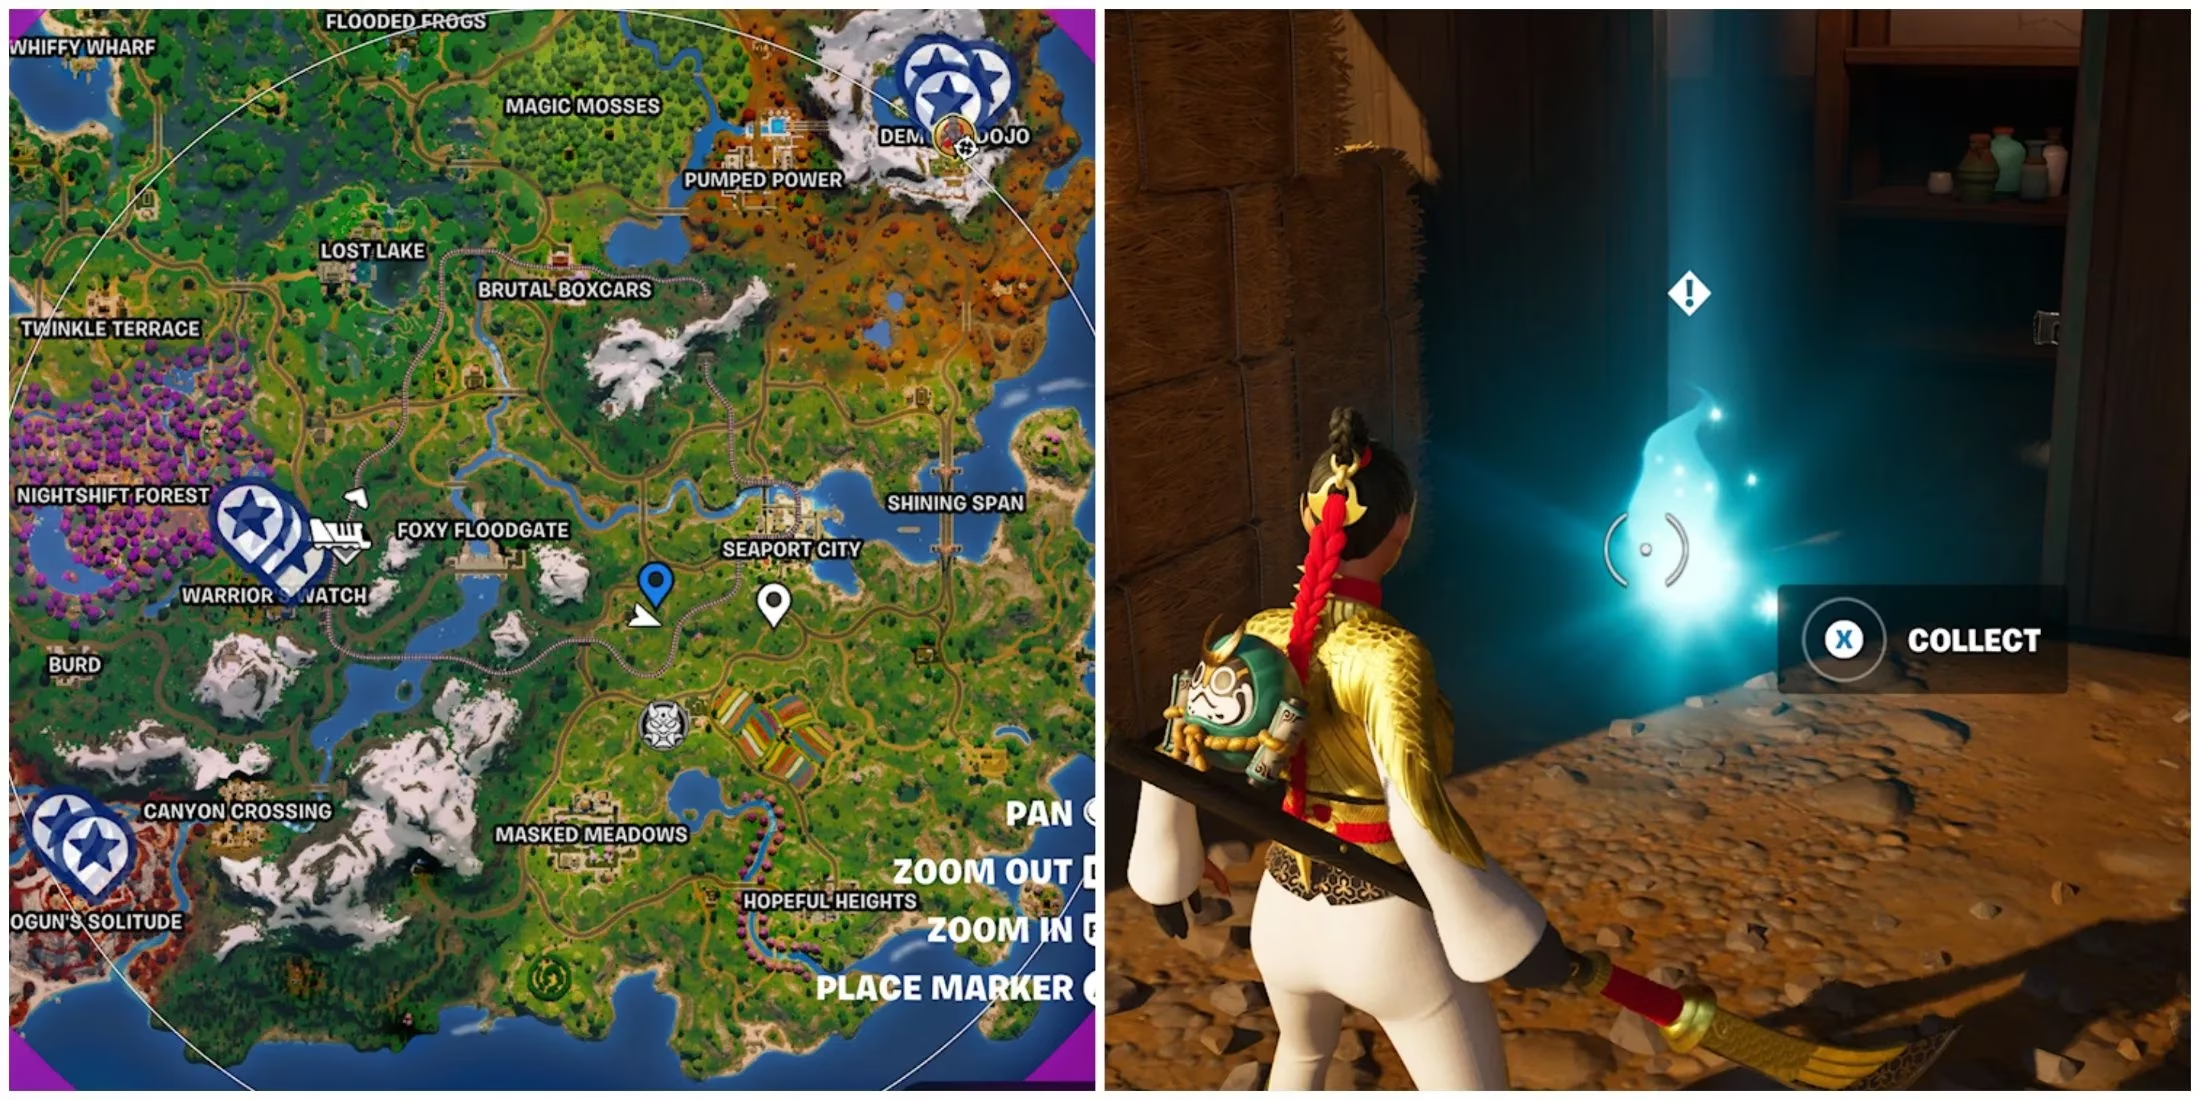
The most efficient route often starts at Demon's Dojo, where essences are scattered around the dojo floor and along the outer balconies. After snagging those three, players can use a Shockwave Grenade or a vehicle to zip over to Shogun's Solitude for the remaining two. The essences float in mid-air with a distinct purple shimmer, so they’re hard to miss—but so are the enemies who have the same idea.
🎯 Pro tip: If the storm is already closing in, it’s smarter to collect what’s possible and finish the rest in a second match. Dying with four essences and losing progress is far more painful than taking it slow.
Stage 5 — Collect Demon Essence from Demons
This stage is a pure grinding checkpoint. Unlike the earlier damage quest, here players must actually eliminate demons—and collect the one Demon Essence item that drops from each corpse. The objective requires a total of 10 essences, so ten demons need to fall. That can be done across multiple matches, but efficiency-minded players will want to rack up as many kills as possible each round.
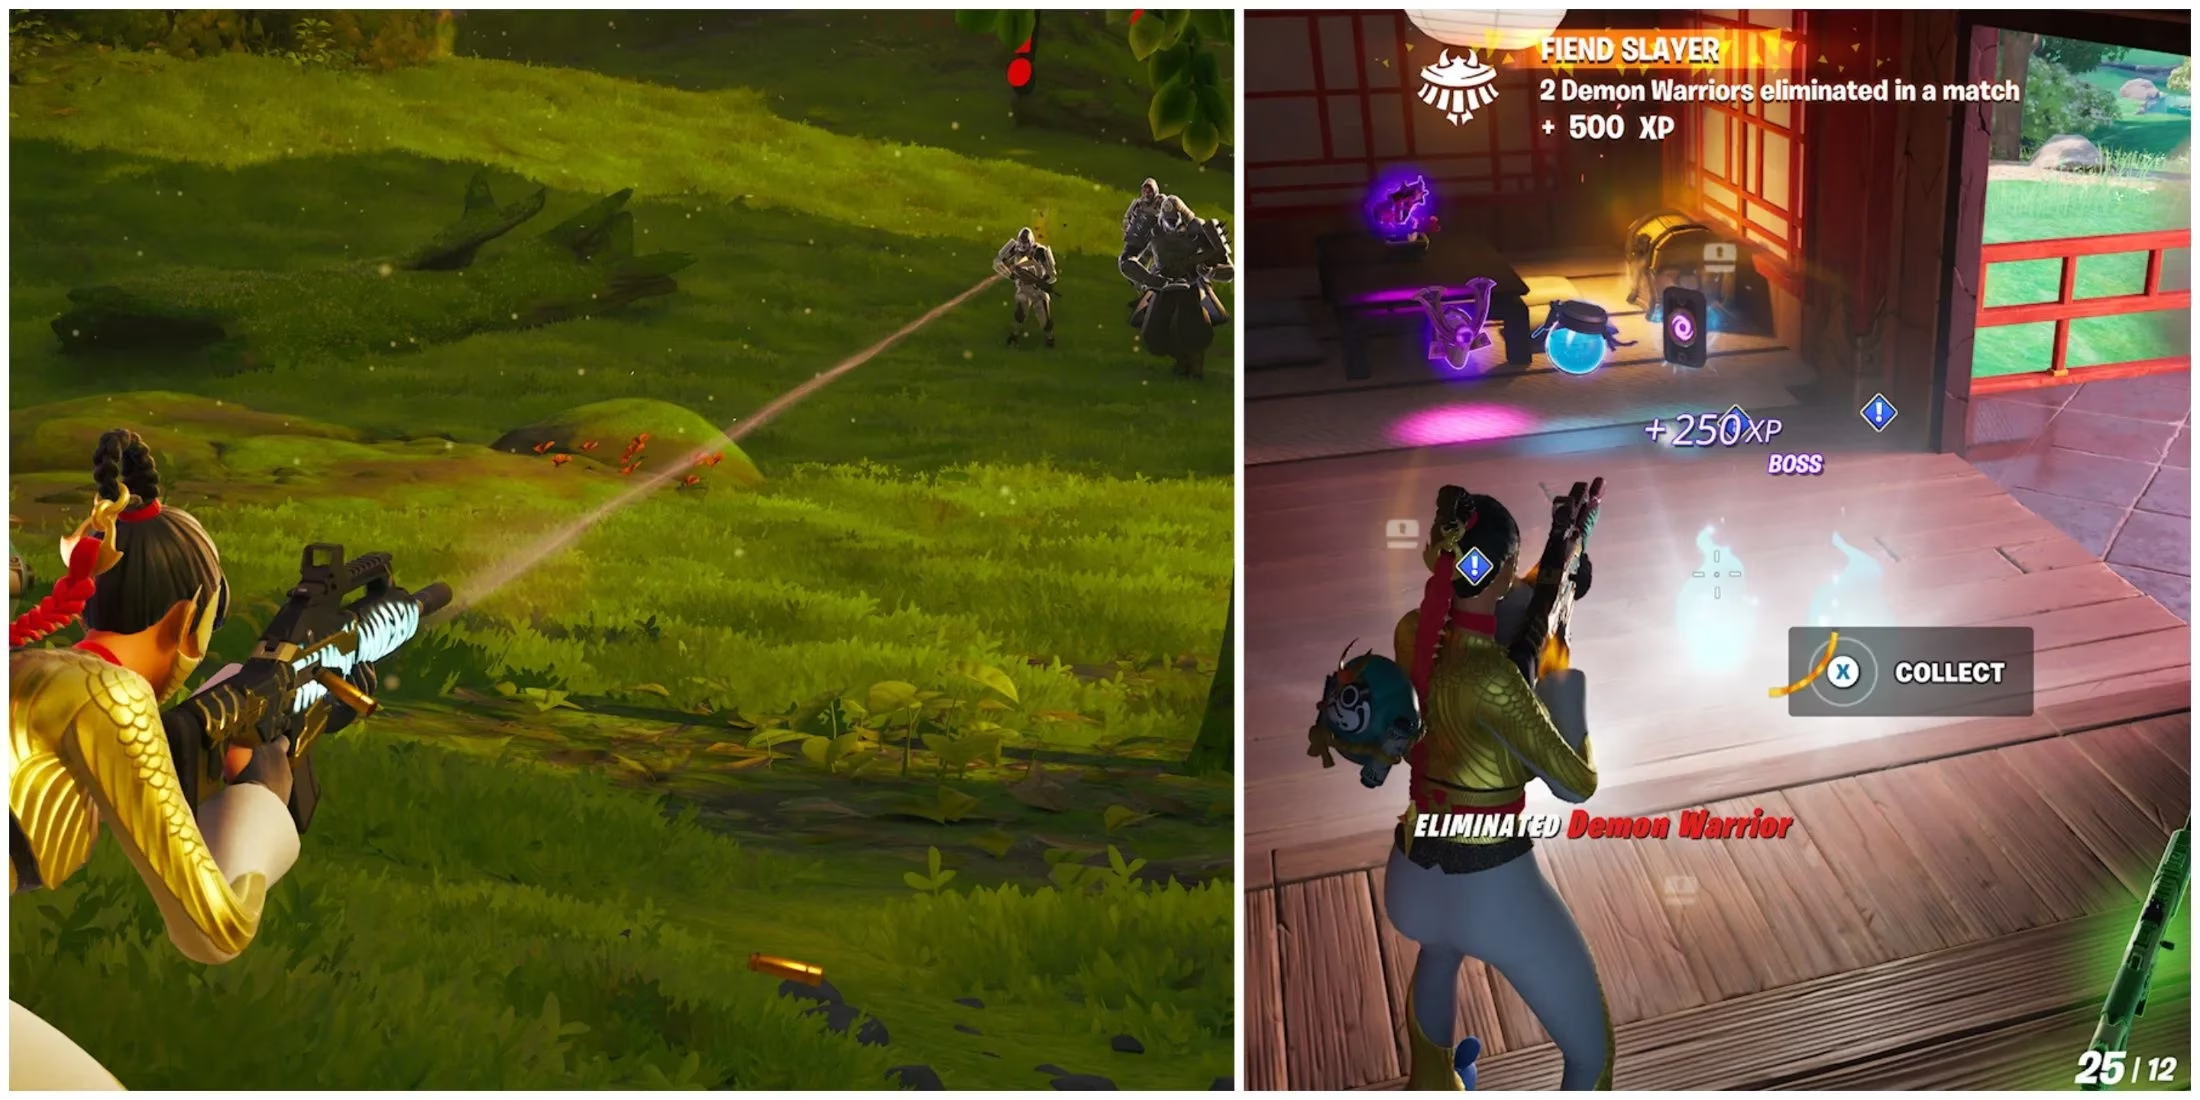
The best strategy is to return to the eight named spawn locations. Since each demon grunt kill counts toward the tally, locations with two grunts and one warrior (anywhere except Sakura Plunge) offer three essences instantly. Cherry on top: Forecast Tower spawns later in the match can provide bonus targets.
A loadout with an SMG or a rapid-fire shotgun makes quick work of grunts, while the warrior requires a bit more evasive movement. Loot the essence immediately after each kill—it looks like a glowing red crystal and gets stored in the inventory like a consumable. Once ten are collected, the quest auto-completes and the remaining essences can be dropped for extra inventory space.
Stage 6 — Talk to Hope
After all that monster slaying, the finale is refreshingly peaceful. Players need to travel to Hopeful Heights, a settlement on the northwestern edge of the map, and speak with Hope. She’s usually found patrolling near the main building complex, easily noticeable by her blue and white outfit.
No demons spawn in her immediate vicinity, so the only danger comes from other players rushing to finish the same quest. A quick landing on a rooftop, a scan for hostiles, and a short conversation later, all six stages are done. The screen will flash with the completion notification and the 25,000 XP reward will pop.
✨ Emotional bonus: The dialogue reveals deeper lore about the demon invasion and sets the stage for future story missions. Stay a moment to actually read Hope’s words—it’s worth it.
Putting It All Together
The Kendo’s Calling story quests serve as a fantastic introduction to Chapter 6 Season 1’s darker tone. By following the steps above, any player can breeze through the chain in under an hour of dedicated playtime and walk away with enough XP to unlock meaningful Battle Pass rewards. The combination of combat, exploration, and brief narrative beats keeps the experience fresh from stage to stage.
Whether you’re chasing the lore or just the precious experience points, knowing exactly where to land and what to expect takes the stress out of the demon hunting. Load in, follow Kendo’s call, and prove that even a warrior from the void is no match for a well-prepared Fortnite player.